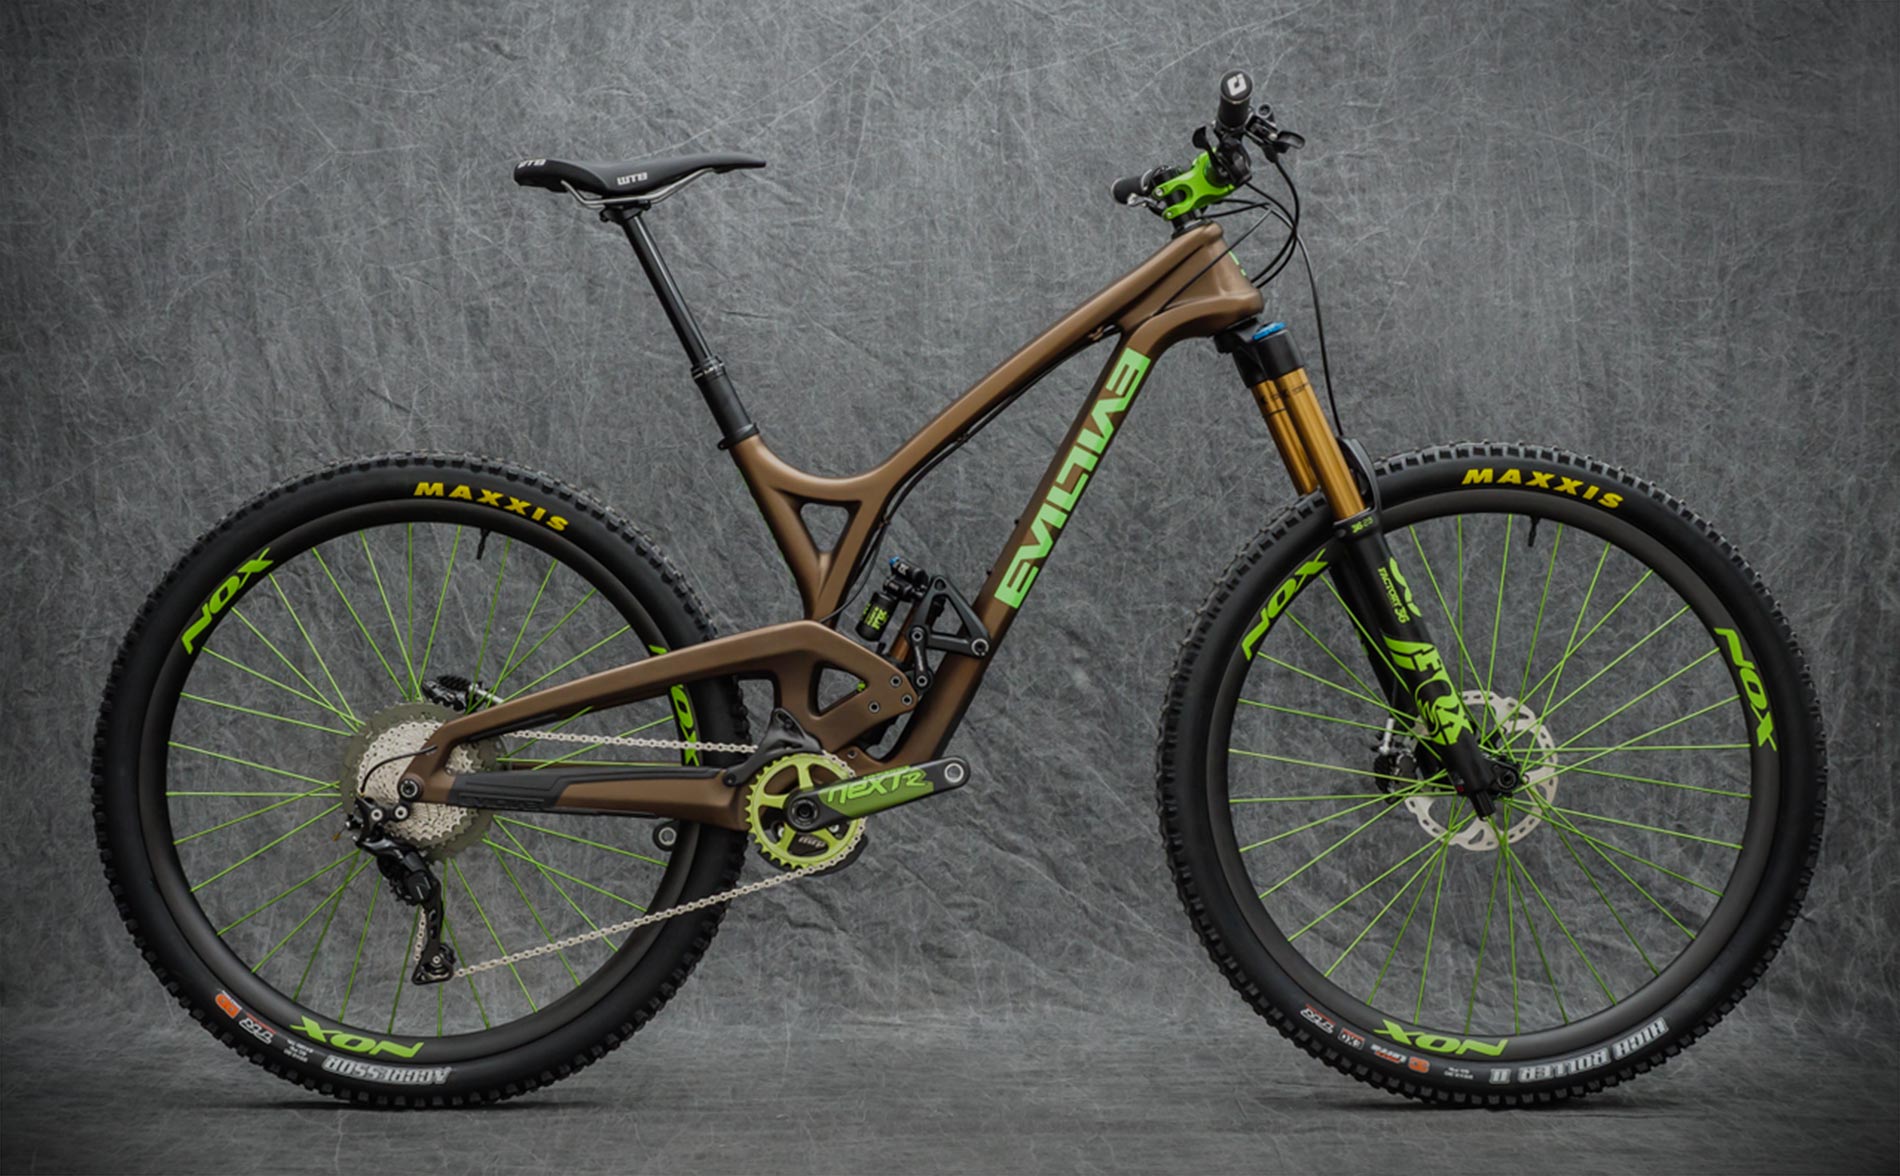
Dave’s Extra Legitimate Travel Apparatus has been around for a while now as the suspension platform for all of Evil Bike’s full suspension rigs. It is easily adaptable to a variety of different applications, from the 120mm travel Following to the soon-to-be released 161mm travel Wreckoning. There are numerous benefits to this single-pivot suspension design. It moves the bulk of the weight of the shock and links as close to the bottom bracket as possible, keeping your bike’s center of gravity down low where it won’t throw you off while cornering. The stable pedaling platform provided even when the shock is wide open is second to none, with no rear wheel movement at all unless you are rolling over chunder or standing up for a sprint. Midway through the travel, DELTA provides a predictable linear feel. Finally, it ramps up in a progressive stroke to provide that bottomless feel we all look for when coming in for a landing on those bigger hits.
We are here today to discuss one of DELTA’s biggest strengths: adjustable geometry. Or in other words, the ability to transform your Evil from a playful, nimble personality to a wildly aggressive personality reminiscent of a downhill bike – all with the simple flip of a couple linkage pieces.
Like we said, this procedure only requires one tool: a 5mm allen wrench, which can be found on the multi-tool in your riding pack.
If you don’t carry a multi-tool, you should, because it will get you out of a tough spot one day.
We will be removing and re-installing a total of 10 identical bolts, which are essentially long chain ring bolts. The bolts are identical on the Insurgent and Wreckoning. If you’re doing this procedure on a Following, you will notice that the six bolts securing the linkage chip to the frame have a wide-flange head, while the other four bolts are the same chainring-style bolts found on the Insurgent/Wreckoning. This is the only difference, and still just requires a 5mm allen wrench. Now that you’ve got your 5 mill in hand, lets get started!
-
Here we can see that this Insurgent is set up in the higher of it’s two geometry settings (called, tongue in cheek, “low”). We will be dropping it into the lower setting, which as you will see is titled “X-low.” Lets start by removing the three bolts on this chip.Here we can see that this Insurgent is set up in the higher of it’s two geometry settings (called, tongue in cheek, “low”). We will be dropping it into the lower setting, which as you will see is titled “X-low.” Lets start by removing the three bolts on this chip.


-
Once we have the three bolts on the swing arm out, lets remove the two bolts on the wishbone, marked “delta system.”

-
With these removed, we can pull the chip and both sides of the wish-bone out of the frame. We will then follow the same procedure on the other side of the swing arm.

-
As you pull the last of the bolts out of the other side of the swing arm, the bike will sag down through all of its travel, leaving the rear tire resting on the seat tube. Don’t worry, this is okay.

-
We will now start to re-assemble everything. Take one of your chips, and flip it over so that the “X-low” label is faceing up, as shown below. Align and press it in to the swing arm, and thread the three bolts in evenly, by hand.


-
When the bolts are threaded in as far as you can go by hand, tighten them completely in an even manner to 65 inch lbs, which is a tightly snug feel. These bolts will break if you over torque them (not the end of the world), so don’t over do it here. If you do accidentally snap one, we have them available here.

-
Now take your inside wishbone (the one without the “delta system” lettering), lift the front triangle of your bike up with one hand (I lift it by the seat-tube), until the chip and linkage are close enough, and push the wishbone into the back side of the red ringed bearings.


-
With the back side of the wishbone in, the bike will stay up in it’s travel on it’s own. Take the front side of the wishbone, labeled “delta system,” and press it in as well. By convention, the top of the lettering will face towards the back of the bike, although this is purely cosmetic, and if reversed will not affect the suspension. Thread the bolts in by hand as far as they will go.


-
Tighten these bolts evenly, again to 65 inch lbs. Once you have completed this side, repeat this procedure with the other side of the swing arm. It will be slightly easier, since the bike will already be sitting at the appropriate height in it’s travel.


-
There we have it folks; ten steps, ten minutes, and you’ve turned your bike from a well composed trail bike into a shred-everything-in-your-path machine! Or vise versa. The world is your oyster when you’ve got Dave’s Extra Legitimate Travel Apparatus on your side!


